If you’ve recently purchased a DJI drone then you may need to know the basics of the DJI Go 4 app. In today’s blog, we will show you the basics to ensure you’re ready to take to the skies!
The DJI Go app works in conjunction with the controllers for the following DJI drones:
Camera for the DJI Go 4
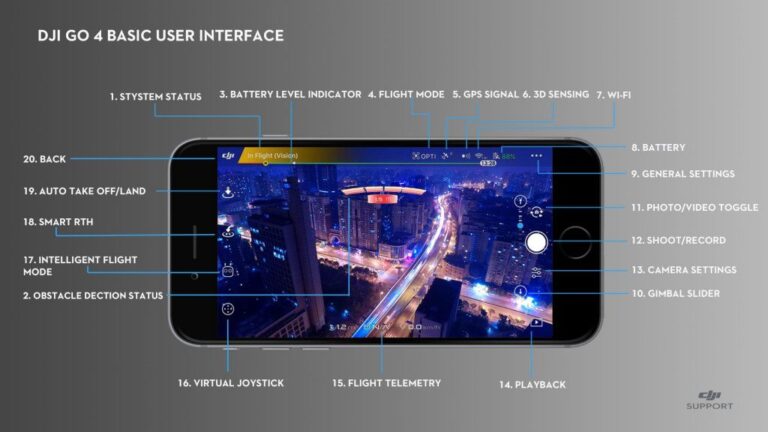
When you’re flying your drone, this is where you will spend most of your time. The icons around the screen are related to different settings when tapped:
- System Status: This shows you the aircraft flight status, as well as displaying various warning messages.
- Obstacle Detection Status: Red bars will be displayed when an obstacle comes close to the aircraft. Orange bars will be shown when obstacles are within the detection range.
- Battery Level Indicator: The battery level indicator provides you with a dynamic display of the battery level. The coloured zones indicate the power levels needed to carry out the different functions.
- Flight Mode: The text next to this icon indicated the current fight mode. Tap to configure the main controller settings. These will allow you to modify the flight limits, as well as setting the gain values.
- GPS Signal Strength: This feature shows the current number of connected GPS satellites. The white bar also indicates adequate GPS signal.
- 3D Sensing System Status: Tap this icon if you need to enable or disable features provided by the 3D sensing system.
- Wi-Fi Settings: Tap this icon to enter the Wi-Fi settings.
- Battery Level: This icon shows the current battery level. Tap to view the battery information menu, set the various battery warnings threshold, and view the battery warning history
- General Settings: Tap to enter the general settings menu for settings, metrics, enabling live streaming, and displaying flight routes and so on
- Gimbal Slide: Displays the pitch of the gimbal
- Photo/Video Toggle: Tap to switch between photo and video recording modes.
- Shoot/Record Button: Tap to start shooting photos or recording video.
- Camera Settings: Tap to enter camera settings menu
- Playback: Tap to enter the Playback page and preview the photos and videos as soon as they are captured.
- Flight Telemetry: This area displays flight information such as flying speed
- Virtual Joystick: Tap this to display the virtual joysticks to control the aircraft via the touchscreen on your mobile device
- Intelligent Flight Mode: Tap to select Intelligent Flight mode
- Smart RTH: Initiate RTH procedure. Tap to have the aircraft return to the last recorded home point
- Auto Take Off/ Landing: Tap to initiate auto take-off or landing
- Back: Tap this icon to return to the main menu.
System Status:
When entering the camera mode on your DJI Go 4, this bar will be one of three colours: green, yellow, or red.
Green:
You have a strong GPS connection, you are ready to fly.
Yellow:
Fly with caution, as the drone may be in ATTI mode meaning it doesn’t have enough GPS signal to maintain a stable position.
Red:
The drone cannot fly, therefore you will be prompted to take action.
When the status bar is tapped, it will bring up a overview of the aircraft systems:
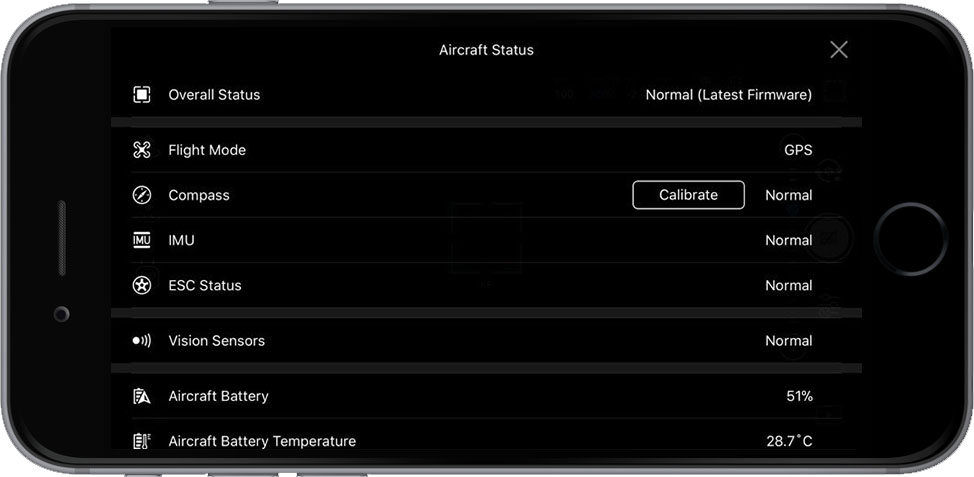
Battery Level:

This quite simply indicates the battery level. The line gets shorter as the battery levels drop. The first dot on the left is when the drone will automatically land due to low power. The second dot is when the app will try to activate RTH. The yellow H represent your home point. It moves along the line to show how much power you will need to get your drone back home.
We hope our guide helps you to navigate around the DJI Go 4 app, for any more help or general enquiries, don’t hesitate to call us on 0330 111 7177.
Download Our FREE RPC-L1 Guide
Understand everything you need to know about moving towards commercial drone operations with our RPC-L1 guide.
- Understand what RPC-L1 is and who it is for
- Learn how the CAA transition impacts operators and training routes
- Get a clear breakdown of requirements, costs and next steps

Related Posts
DJI Launches new M30 & M30T drones
10 minute read The New DJI M30 & M30T deliver industry-leading power and versatility in a backpack-sized package. At the recent DJI Enterprise live event, DJI announced a host of new drone products designed specifically for enterprise and commercial level uses. In a quick summary of the event, DJI launched a new DJI M30 family […]
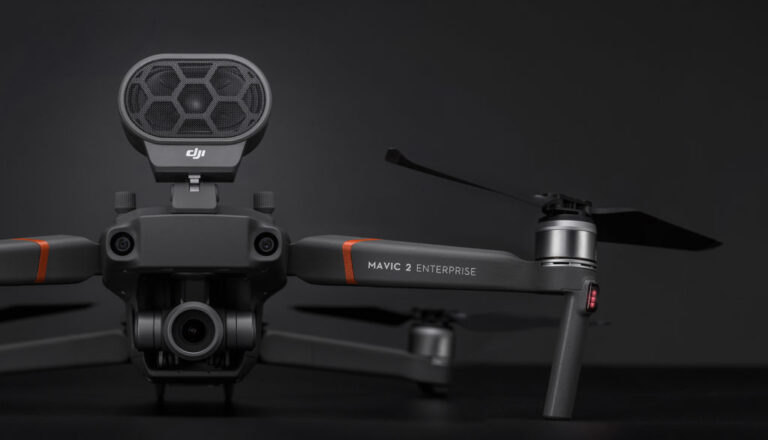
An In-Depth Look at the Mavic 2 Enterprise
When the original Mavic drone was launched back in 2016, it was marketed as a high-end consumer drone. But the platform’s ease of use, extensive payload options and affordability meant it found popularity in a number of industries including construction, surveying and search and rescue. So when DJI launched the updated Mavic 2 Zoom and […]

10 Essential Tips for Beginner Commercial Drone Pilots
Flying a drone for commercial operations such as aerial filming, terra photography, or property inspections allows you to enjoy flying in an amazing variety of places while earning a living at the same time. However, it is worth noting that you always need to be ready for any issues during or before flying your drone.